Tuesday, June 30, 2015

Author Robert E. Blackmon Pens Best-Selling Wedding Guide for Men


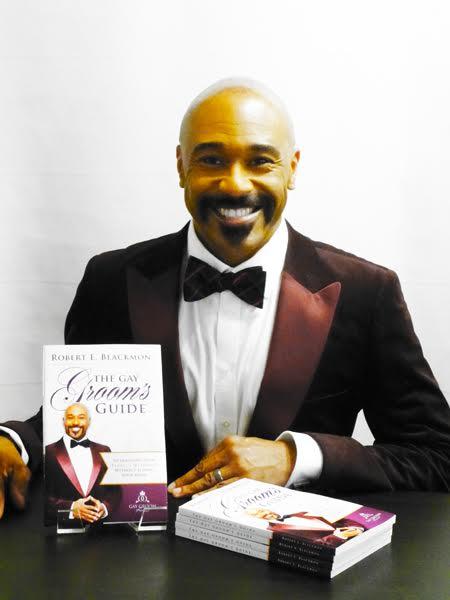
2015-06-29-1435602254-4061120-gaygroomrobert.jpg
Robert E. Blackmon -- The Gay Groom 
(Photo Courtesy of Robert E. Blackmon)
​Weddings are beautiful celebrations that are a testament of the power of tradition, family, commitment and love. But anyone who has ever planned a wedding without the help of a wedding planner will tell you that the process is confusing and can be downright frustrating. As brides, we are overwhelmed with infinite resources that tell us what type of dress we should buy for our body types, how to order a cake and seat our guests and how in what time-frame we should send out our invitations and thank yous... but what about the grooms? And more specifically, what about gay grooms?
In my research to answer this question, I stumbled upon the most unique and groundbreaking book written about weddings in the last 10 years: The Gay Groom's Guide To Planning Your Perfect Wedding: (Without Losing Your Mind) by Robert E. Blackmon. With the shifting zeitgeist, more and more men, both gay and heterosexual, are getting involved in the wedding planning process; however, very few resources have been created that address the pertinent issues that men face while wedding planning. Blackmon felt that the most difficult part of planning his wedding was that, "Everything was about the bride, the dress and the veils... There was no stuff for guys." This book was created out of that need and is the most comprehensive of it's kind.
Robert, a Detroit native, is no stranger to success or hard work. He paid his way through college by designing dresses and went on to become a well-known name in Hollywood. He started his career with an internship at Paramount Studios. That opportunity eventually lead him to work in front of the camera as a correspondent for the show EXTRA, where he conducted hundreds of interviews with celebrities. Blackmon has an impeccable sense of fashion and is considered a style expert who has worked with household names such as Brooke Shields, Bea Arthur and Judy Tenuta. He even owned an upscale baby boutique called, "Aunt Bobbie's Baby." So how does one go from the world of media and styling Hollywood's elite to writing a best-selling book about weddings?
"The Gay Groom's Guide was never intended to be a book," says Blackmon. During the planning of his wedding with his husband, Martin Connell, he began documenting his experiences. In 2014, he released the first edition and it was an instant success in Canada and America. When asked if there is a difference between wedding planning for straight couples versus gay couples, Blackmon says that all weddings are basically the same ceremonially but are different in the power dynamic of how the event is planned. In straight weddings, it is common for the bride to have most of the control in planning and "the groom just shows up." With two men or two women marrying, there is a different dynamic which often involves a shared planning process. In this current bride-centric wedding culture, the needs of men of all orientations are often lost in the shuffle. The current resources don't really address the needs of men when it comes to what to wear, how to plan and what to expect when planning such an important event.
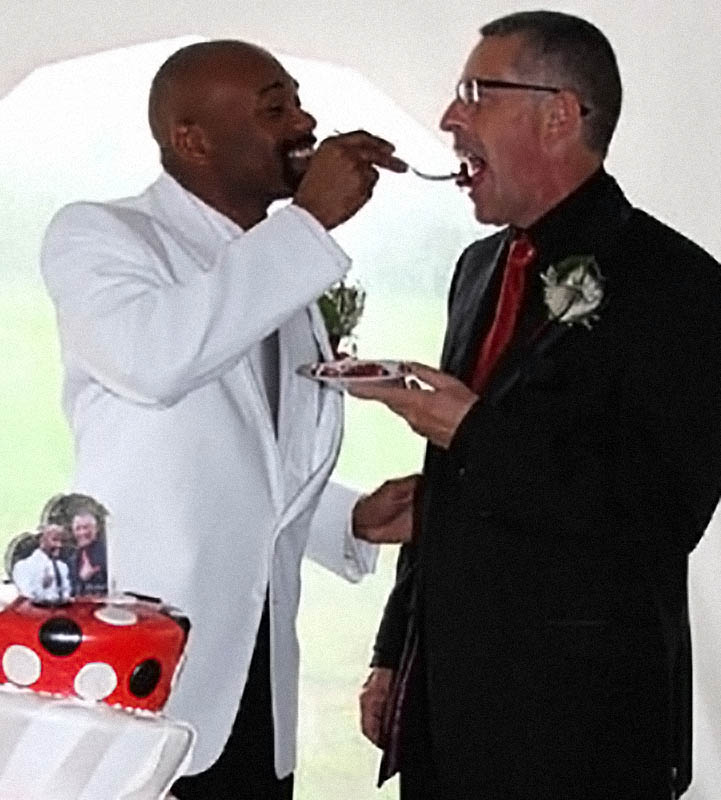
2015-06-29-1435602333-4243037-gaygroomrobert2.jpg
​Robert and his Husband Martin
The book is not only meant to be read. It also acts as a portable workbook that grooms can use to organize their plans on the go. It's formatted in a clear-cut, bullet-point fashion and features anecdotes from Blackmon's own wedding to show the readers what he and Martin did right and wrong during their planning. The Gay Groom brandhas also been extended to Youtube, where Robert has concise videos that address everything from floral and seating arrangements to what to wear, with men in mind. That's the beauty of The Gay Groom's Guide: it is written by a man for other men and addresses the needs specific to that demographic. Even though this book is created with gay grooms in mind, it can be used as a practical guide for anyone who wants to take the headache out of wedding planning, including lesbian and straight couples.
Most people see Robert's impeccable style and Hollywood credentials, but what they don't get to see is Robert the husband, the son, the friend, and the family man. "Family is everything to me," says Blackmon. He sees weddings as a Rites of Passage for couples that want to commemorate their unions through authentic celebrations that fuse tradition, ritual, style and creativity. Robert and Martin were married in Canada, where marriage equality has been the law for over a decade, on the front porch of their home. There was concern that Robert's ailing father would not be able to make the international trip to attend the wedding. Fortunately he was able to attend, although he passed away just six short months later. My father also passed away shortly after my wedding and we both look back at our wedding days as a connection to our late fathers. When you suffer a great loss after such life milestone, the day takes on a greater meaning in retrospect.
Blackmon's foresight has proven him to be a trailblazer in the world of style and wedding planning and it has has paid off in a big way. In what most would consider magically serendipitous timing, the 2nd edition of his book was released just weeks before the historic SCOTUS ruling stating that the Constitution guarantees the right to marry to all people, thereby legalizing all marriages in the US. After the announcement of the ruling, Blackmon's book sales increased by 500 percent. He sold a staggering 12,000 copies over the weekend, grossing over $350,000 dollars, and I wouldn't expect sales to slow down anytime soon.
Robert's book can be found on his website www.GayGroomRobert.com or throughAmazon.

Monday, March 30, 2015

5 Unconventional Ways to Save Money on Your Wedding

The wedding blogosphere is rich and ripe with ideas that are not only awe-inspiring, but oftentimes expensive and complicated to replicate; however, there are ways to save money on your wedding without giving up all things that you really want. The key to using sites like Pintrest and TheKnot.com is to inspire you with thoughts to incorporate into your celebration, not to give you a blueprint to replicate identically. To do so may be very costly and that's how you end up with a wedding that costs the amount of a down-payment on a house. Use wedding sites to figure out what direction you want to go with for your celebration, but don't feel obligated to use traditional means to get there. You have to be creative and put away your preconceived notions of how a wedding "has to be done". Here are some tips that might be helpful to save money just by contemplating alternative ways to tackle some of your biggest costs.

 1. Find a venue that offers more than just an empty room. Make a pros/cons sheet for every venue you visit. This will help you accurately evaluate the true value of the rental, versus just considering the base cost. Find one that offers other amenities than just the room itself such as a sound system, lighting, a built-in bar area, or a discount on catering or rentals through their preferred vendors, included in the price of the venue rental. You may find a cheap rental hall but then realize you have to do a lot of decorating, which is expensive. A venue that is more ornate may cost more, but may also not need any decorations, except for simple centerpieces.

 2. Consider alternative materials for your rings. There are many unconventional materials used to make wedding rings these days. Some of the most popular alternatives to gold and platinum include: Silver, Titanium, Palladium, Cobalt, Tungsten, and Stainless Steel. Rings made in these materials can be quite impressive and start at around $100 a ring--sometimes less. They all have their pros and cons, so review the attributes of each type of metal and choose one that is good for your budget and lifestyle. Don't forget to look into other materials like ceramics, carved stone, or wood.

Precious gems or stones such as Ruby, Sapphire, Topaz, Pyrite, Opal, Onyx, and Pearl all make wonderful and unique jewelry that might be cheaper than buying expensive diamonds. If your heart is set on having diamonds, look for laboratory diamonds to save money. Lab diamonds have the exact same chemical and physical make up as mined diamonds, but cost 30% less. They are also conflict-free and origin-guaranteed for people concerned about the ethical costs of buying diamonds.

3. Skip some of the preliminary parties.
Your wedding day is expensive enough. Not just for you, but anyone who is involved or attends it. If it's not a big deal to you, skip some or all of the preliminary parties. I did not have an engagement party, bachelorette party, or bridal shower. This not only saved me money and time, but it saved my bridesmaids money too. If you aren't that interested in having these parties, don't feel obligated to have them for the sake of tradition. You can also save money by turning the rehearsal dinner into a family-style meal cooked by your wedding party or family and friends that want to help.

For our rehearsal dinner, we invited everyone involved with the wedding and our out-of-own guests, and my bridesmaids cooked spaghetti and garlic bread for everyone. We spent about $40 to feed over 20 people. My bridesmaids' children even decided to go around and ask everyone what they wanted and served our guests. It was really cute and it gave the older kids something to do, so they felt involved. With the average cost of a rehearsal dinner being about $1,300, this is a good place to make budget cuts.

4. Look for a venue that allows you to bring your own food and cater through a large chain restaurant or upscale grocery store deli.
Instead of going through a caterer that is geared specifically for weddings (which can cost $40-75 per guest), get catering through a large-chain restaurant or grocery store deli that you enjoy (if your venue allows you to bring in your own food), and serve it buffet style. Cheesecake Factory's catering is very reasonable at approximately $16 per person, which includes their famous bread and serving utensils. Noodles and Company can cater for $12 per person, and includes salad and desserts--which you can use for your sweets table. Whole Foods catering was surprisingly reasonable, at about $3-10 per person for entrees and starting at a $1 per person, per appetizer.

5. Buy blank cakes and decorate them with toppers from Etsy.com.
Instead of buying a stacked, decorated cake, ask your baker to sell you single blank cakes for each tier you would have bought, then decorate them with edible wedding cake toppers from Etsy.com. Handmade gumpaste flowers can be purchased from as low as $8 a piece to $35 for a whole set, and can be bought months in advance. Put the single cakes on a separate tiered cake stands for a very dramatic effect. I saved about $400 buying blank cakes and having some friends from work put the toppers on for me. My favorite Etsy shops for cake toppers are SugarRobot and ModestlySweet.

 The truth is, your guests will just be happy to be there with you. Whether you have a certain type of cake or not, a spectacular wedding venue, or just a cake and punch reception in a local park after a courthouse wedding, most of your guests won't care. And you shouldn't either. It's great to take pride and put a lot of effort into planning your wedding, but it shouldn't come at the cost of you going into extra debt or stressing out about a budget that could be easily cut by changing the way you approach wedding planning.

Tuesday, March 10, 2015

The Peacock Bride: A Letter To My Late Father 8 Months After My Wedding

Dear Dad,

I was looking through pictures of my wedding that was just eight short months ago and I am overcome with a sense of gratitude and love when I see your face in them. When I first told you that Anthony was "The One", you were apprehensive about it (as any good father would be). A few years later, you grew to love him as your own son.
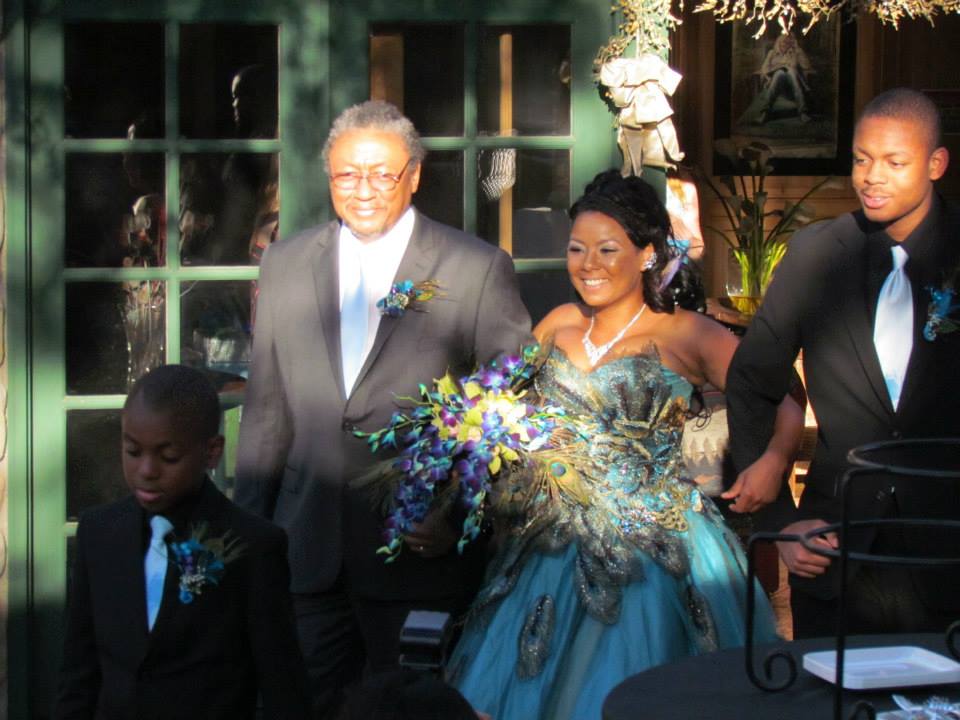
2015-03-06-1425614217-1178039-dadwalkingmedowntheaisle.jpg
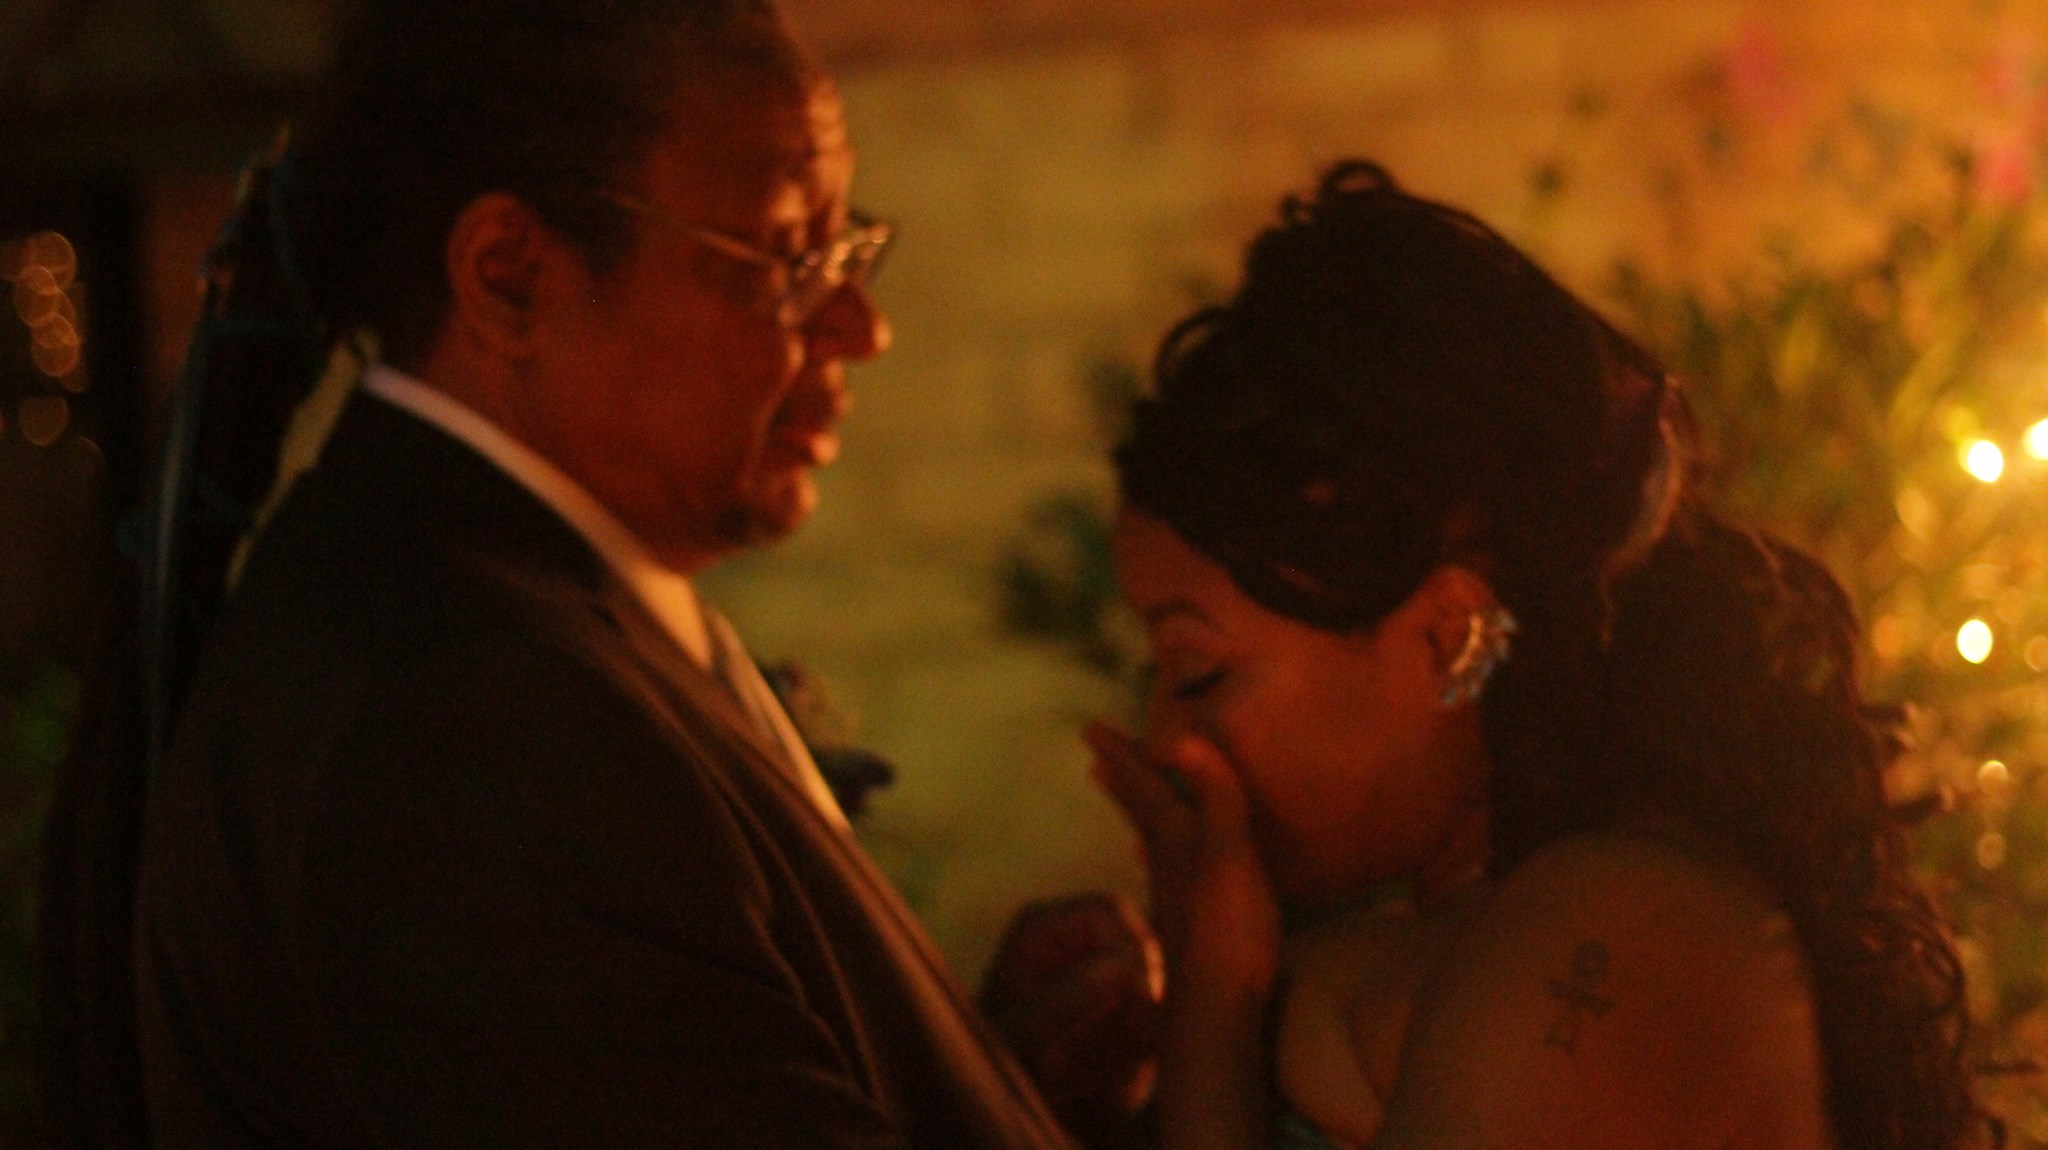
I never had a vision of what my wedding would be like. All I could think about was you walking me down the aisle and us having our father-daughter dance. No, I didn't wear a white dress. I wore a blue peacock-colored one. No, I didn't take out my piercings or cover my tattoos. No, I didn't have a religious ceremony. No matter how progressive my beliefs are, I still wanted you to present me for marriage. In fact, you and my three nephews walked me down the aisle. I wanted my husband to know that before I met him, there were four men in my life whom I will always love. I made you a leather hair wrap, adorned with peacock feathers, to tie your massive dreadlocks into a neat pony tail that dangled to your waist. Dancing with you was, indeed, the best moment of my life. I have never felt more beautiful and you confirmed that by telling me, "You look absolutely gorgeous," before you gave me a kiss on the cheek and prepared to give your baby away.
2015-03-06-1425615350-4999569-dancingwithdad.jpg
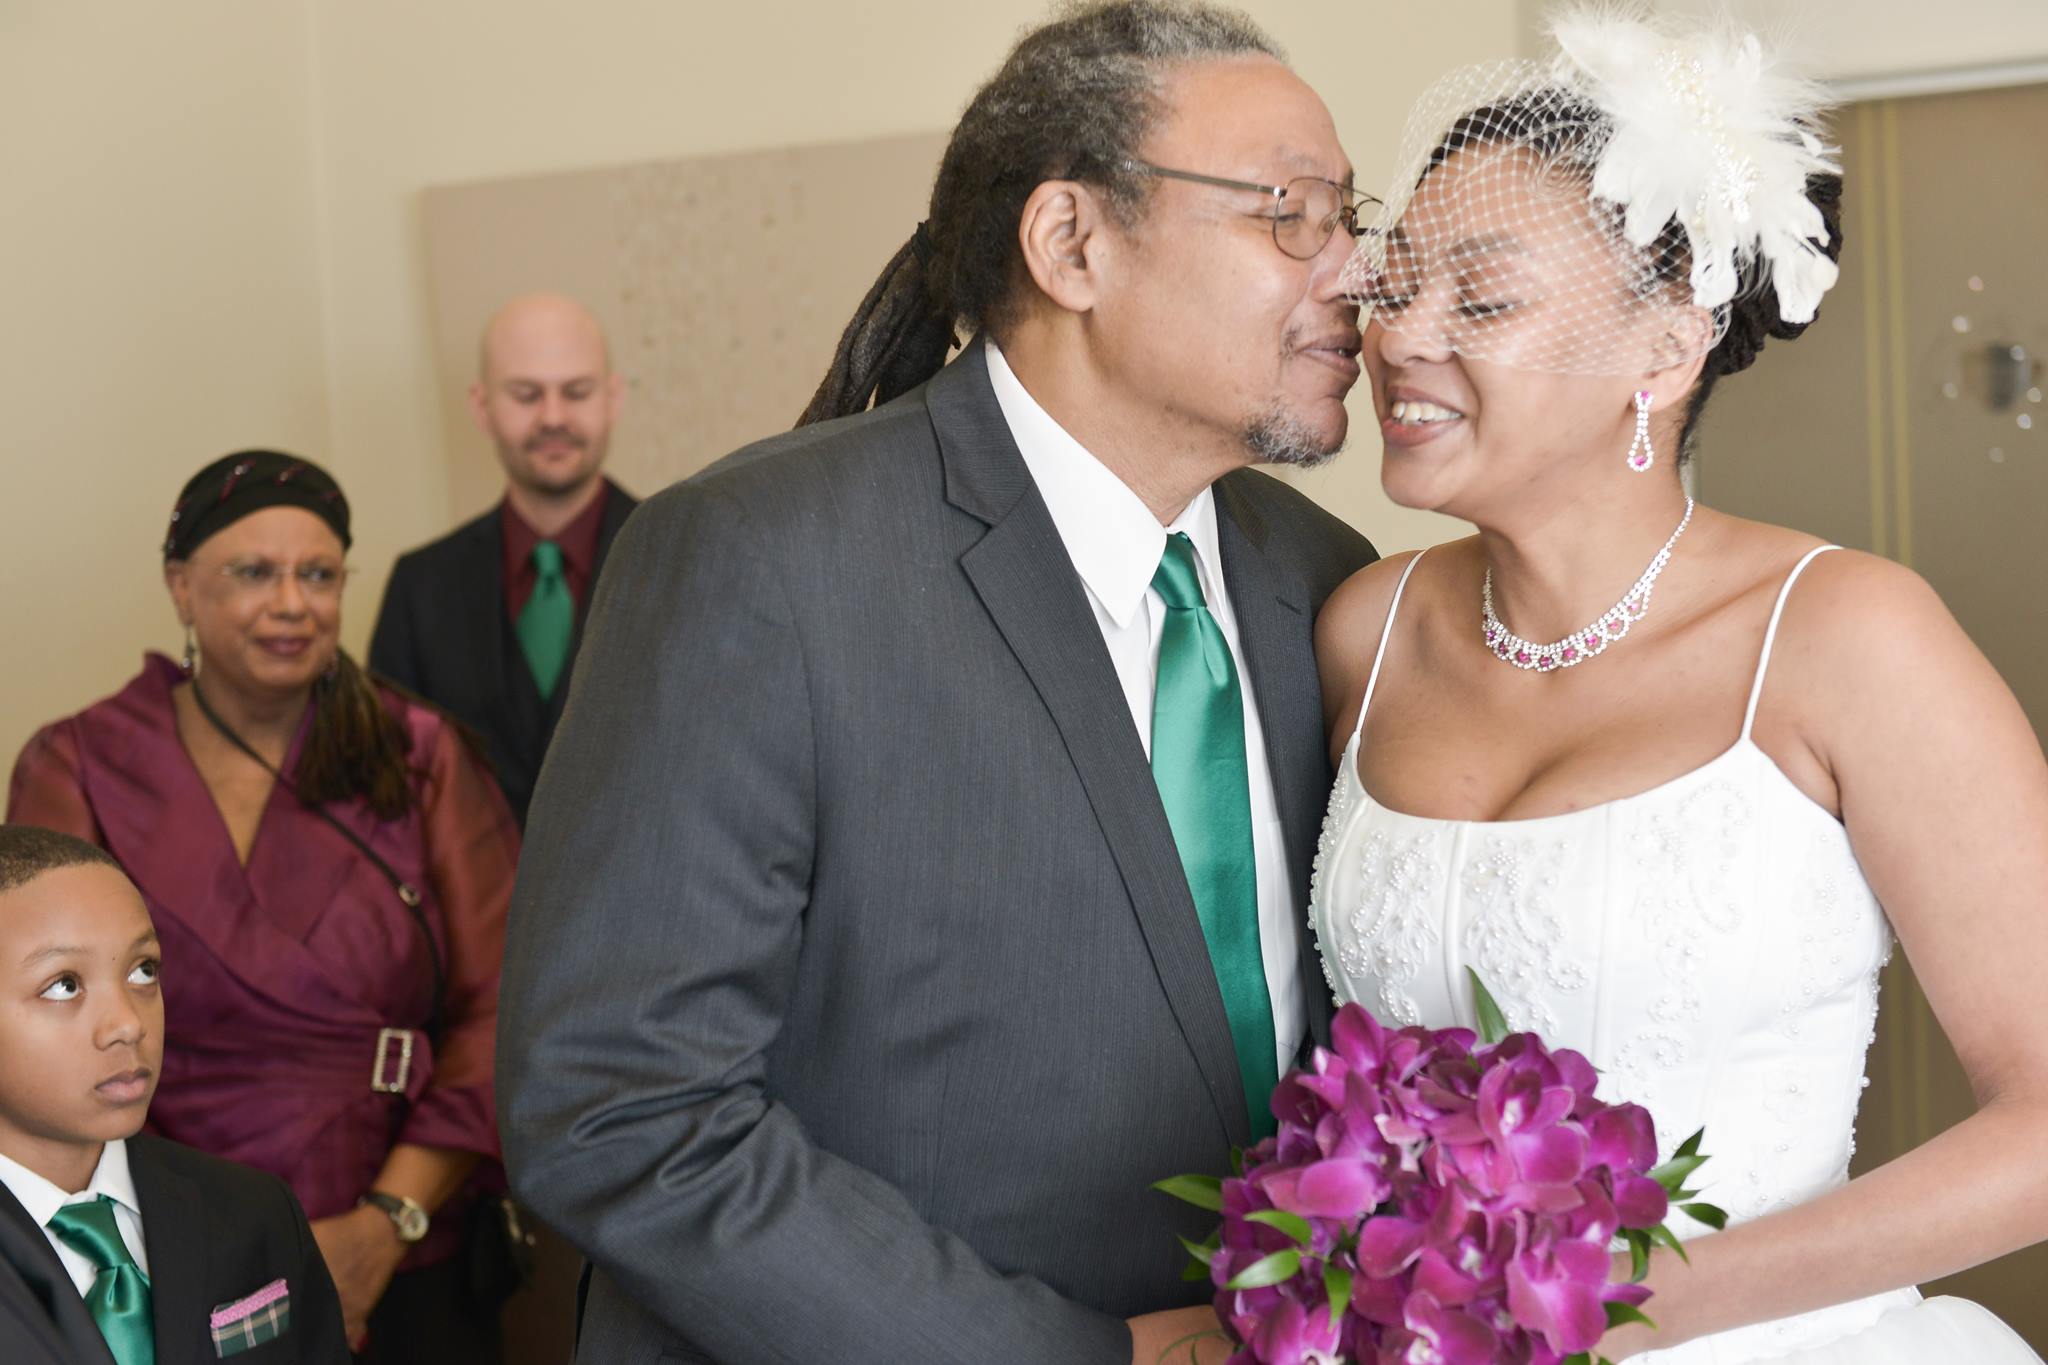
When Mom asked us to share our honeymoon with our family, I thought she was insane but we took her up on the offer. We spent three days going to Disneyland, Universal Studios, and Medieval Times with our whole tribe, which we affectionately call "The Latimer 10", and two of my best girlfriends. We rode all the rides and stuffed ourselves silly with junk food. Looking back, I wouldn't have had it any other way. Everyone was getting along and life seemed so perfect. And it only got better. Six months later, you had the honor of giving your other daughter, Sonja, away at her quaint wedding in Vegas. She had been with her now-husband for over 15 years. Four children and all those years later, you gave her away with such pride. I remember you telling my sister before you walked her down the aisle how beautiful she looked and then you said, "There is no greater joy than giving both of my girls away."
2015-03-06-1425615397-8188195-sonjadadgivingheraway.jpg
The best moment of my life was when we danced under the beautiful twinkle lights on that California night. The worst moment of my life was two days after we came back from my sister's wedding when you told me, in the smallest voice I have ever heard you speak in, that the pain in your side you were experiencing at my sister's wedding was not the stomach flu, but pancreatic cancer. How could that be? Weren't we just dancing the night away? Didn't we all get on the rides together and eat delicious foods that were as rich as the love our family has for each other? Weren't we all just in Vegas having breakfast before we parted ways -- you and Mom back to Minnesota and my husband and I back to Los Angeles? What happened between June 21st, 2014, my wedding day, and the day my life stopped on December 15th, 2014 when cancer became a household word in our family?
I almost collapsed when you told me and you asked to speak to my husband. You told him to take care of me and to love me. We decided to move back home to Minnesota help the family while you were going to go through chemo. You told us not to come home, but we did anyway. You told me, "Don't disturb your life for me." I reminded you, "Dad, you are my life."
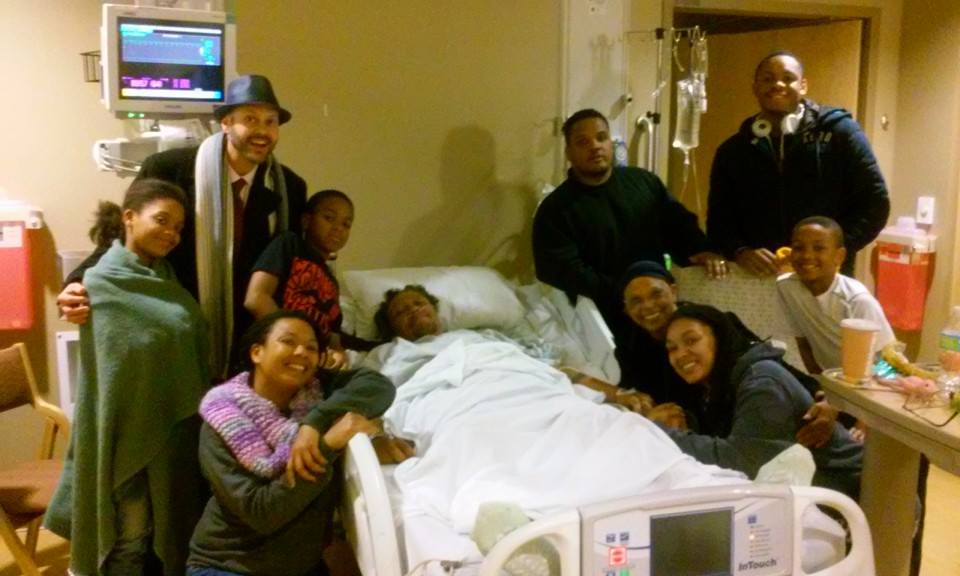
A few days later, I got a call from Mom and my Godfather, your best friend. Your kidneys were failing and the time of your departure was drawing near. We got on a flight that same day. For four days, friends and family flooded your bedside. I never saw you happier than when you were dying. You left us the greatest words of wisdom. Everyone that came was profoundly touched by the transcendent experience of your passing. You told my husband, which you were once apprehensive about bringing into our family, that he was the son you never had and always wanted and that our family was complete now that he was in it. You died on January 4th, 2015 only 21 days after your diagnosis. You were only 63 years old. My world crumbled around me. The dance surely had to end, but why so soon?
2015-03-06-1425615484-238680-lastfamilyphoto.jpgOur Last Family Photo
You are gone in the physical sense but in my heart, we are still dancing the night away under twinkle lights. We are still riding on the back of your motorcycle on the open road. In my heart, you are telling me I am beautiful and I am starting to believe it. I have not stopped crying since you've passed away. I will never forget the gift of your friendship and how you fathered me. I want you to know that our dance will never end and when I return to my essence and we will be united again.

Eternal Love from your Biker Babe,
Sydney
2015-03-06-1425614943-3220117-bikerbabe.jpg

Sunday, March 8, 2015

An Open Letter to "Dancing Man" from The Peacock Bride

Dear Dancing Man, 
I've been reading about you online. I feel like we are kindred spirits because I too, love to dance. In fact, I've call myself a "victim of the rhythm". When I hear music, I HAVE to dance!! I am not alone, because I see that you like to dance too. I think it's horrible that bullies tried to get you to stop dancing.

I just want to tell you I am glad that you are having a dance party in your honor. At this moment, I can't think of anyone who deserves it more than you. The fact that some lame guys tried to shame you and make you feel like less of a human being literally made me cry. I can't say, "I can't believe someone would do that"...because that is not surprising. People are cruel and they want to suck the joy out of other people's lives because they are small people. 

When I saw the picture of your head down, I wanted to scream, "CHIN UP, BUTTERCUP!!"

You must promise me one thing, Dancing Man. Promise me that you will NEVER EVER EVER hang your head low due to bullies. Promise me that you will never stop dancing! You are a human being that is worthy of dignity, respect, love, and acceptance. You need to know, no matter how many times you've been bullied by people because of how you look--you are accepted. You are accepted by me and so many others out there. 

Yeah, you're a big guy. So what! You're a big guy who has a big heart and if I knew you in real life I think we'd have fun talking about music; perhaps we would dance if the right song came on. Maybe you could show me your moves. But we probably won't ever meet. But I hope that in some way, this message gets to you. I can't make it to your dance party. But I wish I could. I just wanted you to know that you are not less of a human. You are just a victim of the rhythm, just like me. 

While you are surrounded by a wonderful group of beautiful people that love and accept you, having celebrity DJ's spin for you, and people gathering in your honor...please know that this is because you are loved and you deserve this party. You are loved by all of us that have been bullied. You are loved by reformed bullies that have repented and now work to end bullying. You are loved by your family, friends, and by people you don't even know. 


Dancing Man, promise me that
you'll always dance

 like EVERYONE is watching. 

And we will be watching...we will be watching and cheering you on. And from this day forward, I don't ever want to hear about you having your head hung low for any reason. Especially due to small-minded people whose lives are so terrible they can't see the beauty in a big, beautiful man dancing. 

I love you. Good luck! 


Wednesday, March 4, 2015

Saturday, January 24, 2015

Twin Cities Wedding Venues!


I just started following Wedding Fair MN on Twitter, and they also have an AMAZING Pintrest Page!! Are you looking for wedding venues in the Twin Cities? If so, I would check out their Pintrest!!

Monday, January 19, 2015

The Grieving Bride: The sudden death of my Father 6 months after my wedding


Hello everyone! I've taken a long break--my sister was married on 12-13-14 in a beautiful, small ceremony in Las Vegas, NV. 2 days after we got back from my sister's wedding...my father calls and tells me he has Stage 3 Pancreatic Cancer. His kidneys started to fail and few days after and he died 21 days after my sister's wedding on January 4th, 2015. I am going to write more about this, but I am just too hurt and sad to really tackle my emotions through writing. I wanted to share a few videos I made. The first one I made to cheer up my dad after he told us he had cancer. I really miss my dad, as he was my best friend and my father as well. Please excuse my absence. I will be back soon. 


Thursday, July 17, 2014

The Do-It-Yourself Bride: How to Make Your Own Titled S'Mores Buffet with Sterno Cans in 7 Steps!


Hello, my Darling Peacocks...


I am so excited to finally show you some of the finished DIY Projects I did and show you how you can repeat the same projects for your own parties or just for fun!! These S'Mores Buffets are usually made in planter boxes, which can be very costly. Most 4 foot boxes cost up to $120, and that does not include the sand, decorative rocks, or the Sterno cans!!


We decided to do a S'More's Bar for our wedding! Not only are S'Mores a yummy option to do instead of having a dessert bar or sweets table--it gives your guests something do do. Not only is it activity, it's fun and delicious! Pintrest has tons of inspirational pictures, so I came up with this idea for a S'Mores Bar using buckets.


It included a lot of yummy goodies. Diet be Damned, we needed to create what has been called the ULTIMATE S'MORES BAR. I went all out and bought 4 types of Marshmallows: Vanilla Bean, Caramel Swirl, Chocolate Chip, and Toasted Coconut. I bought them from PLUSHPUFFS.COM, which is a gourmet marshmallow company. Such things exist? Yeah they do...


We also had 4 types of grahams/cookies--including original graham, chocolate grahams (Which Nabisco stopped making...so don't bother looking. I hate to tell you how much I paid per box on Ebay!!), cinnamon grahams, and butter waffle cookies from Trader Joe's. The toppings were infinite--Peanut Butter, Nutella, Cookie Butter, chocolate syrup, caramel sauce, coconut shavings, chocolate chips, and a slew of bite-sized candy bars. We also had milk chocolate, milk chocolate with cripies, dark chocolate, and dark chocolate with almonds. And then I also brought my Cinnamon and sugar and Chocolate and Coffee grinders I bought at Trader Joe's last Christmas. Such a sinful feast.


This is what the Bar looks like in daylight:
                         

I generally have a lot of art supplies around my house, and I love to re-purpose stuff, so sometimes my projects will cost a lot less than if I had to buy all the materials. I also live near Downtown, Los Angeles, so finding wholesale prices is very easy. So I will try my best to give you an approximation of how much this project costs to do.


MATERIALS NEEDED

ONE 2-6 ft piece of common lumber

ONE tube of industrial strength adhesive glue
(Such as Florabond or E600)


ONE to TWO square foot sheets of glass,
 ceramic or natural stone tiles 
(I used the tile on the right, Vineyard 12 in. x 12 in. x 4 mm Glass Mosaic Wall Tile from Home Depot, which was $4.99. I bought 3 or 4 tile squares, so I have some extra to make foot stones for my garden. The one on the left is a beautiful tile called Coppa Marina 12 in. x 12 in. x 4 mm Glass Mosaic Tile, also available at Home Depot. If you wanted to get creative, you could use shells or pennies to tile the board and get copper buckets or even have wooden boxes that attach to hold the sterno cans instead of a bucket).


TWO to SIX Machine Screws and Washers 
(I made mine with 6 Sterno cans, so I needed 6 screws with washers. You want to get the flat edged machine screws because they are safer to take to buckets on and off. This Multi-pack might be good to keep around the house. This 84 piece set is available at Home Depot for under $5.)


A Power Drill with A Drilling Bit

TWO to SIX Metal/Tin Painted Pails 
(I choose 6 buckets in my blue ombre colors of Turquoise, Light Blue, and White)

Wooden Cut out Letters
(I found letters at my local craft store. I painted them all with a blue ombre color and then I lined them with rhinestones. If you want plain letters or don't feel like painting them, this online store called Craftcuts.com has some REALLY cool letters you can buy. Letters will range from $1 to $12 a piece, depending on how fancy you want to make them. You could save money by just painting the letters onto the buckets, but I like the 3D effect of cut-out letters.)


Acrylic Paint 


Grout and a Rubber Grout Float or Caulk  

Sand and Decorative Glass

Rhinestone Ribbons


Sterno Cans 


The Steps

STEP ONE
Set your tiles onto the board to see how the placement will be. You will need to measure your board, and divide board based upon how many buckets you will be using. I used 6, so I divided my board into 6 even parts. Make sure you place your tiles before you glue them down. Once the glue begins to dry, those tiles will most likely not come off easily. The buckets will need a place to attach, so need to figure out how many tiles will go up your board vertically and how many will go across horizontally. Mine went 6 up and 61 across.


STEP TWO


Begin gluing your tiles down. Remember: you will need leave 2 tiles out where your buckets will attach. This will vary depending on the length of your board and how many buckets you choose to attach to it. I would let this dry for at least 24 hours or more. Make sure that all of the tiles are secure and dry before you start drilling the board.

STEP THREE
 Step three is optional, but I did it because I think it polishes off the look. 

After your tiled board is dry, it's time to grout the board. I originally did this last, but in hindsight, it would be better to do it before you drill the holes. I don't have pictures of me actually grouting the board, but it's easy. Mix the grout with water. If you want colored grout, just add some pigment or a nice amount of acrylic paint. Colored grout is hard to come by, and if you want extreme colors, you will have to add the color yourself. Spread the grout across the tile with a spatula. Then you take the GROUT FLOAT and run it across the board to put the grout into the spaces in the tile and remove excess grout. After every space is filled with grout and you have smoothed it over with the float, take a wet towel and wipe off the excess grout on the board. Clean and polish the board after the grout it totally dry. Again, I would give this overnight or several hours at the very least to totally dry. 

STEP FOUR
Well, this is where the fun REALLY starts. Break out your power drill with a drill bit and drill a hole right in the middle of the spaces you left open for the buckets to attach. After you have drilled the holes, insert your machine screws. 


STEP FIVE
  
This is the machine screw
put through the bucket
without a washer.

This is what the bucket looks like
attached with a washer.
 
Drill holes directly in the bottom of the buckets. Those holes will allow the machine screw to go through into the bottom of the bucket. Tighten the bucket onto the board using a washer. I used 3 different color buckets. But you can alternate colors, or use all the same colors. Use your creativity and use variations in your color scheme.  

The picture to the left is how the bucket looks when it's attached...but I also wanted you to notice how the sides of the board are still their original color. You're going to want to paint the sides of the board with acrylic paint. You could also use rhinestones, buttons, or whatever you would like to decorate the sides of the board. Just remember, the board will be holding sterno cans, so you don't want to add anything the might catch fire if someone drops a flaming marshmallow!! The reason why you don't want to permanently attach the buckets it because it's a lot easier to transport this without the buckets attached. I remember I forgot to detach a bucket, and the thing fell and dented the bucket. I tried to replace it, but they didn't have white buckets anymore. I had to fix the broken bucket--so be careful with this because it can fall and you will lose tile. 

STEP SIX

Now you have to do your letters. I found my letters at the craft store, but I listed some sites where you can find cool letters. I first painted my letters, and then I lined the sides with some rhinestone. When I rhinestone a large or intricate area, I use Rhinestones on sheets. I used some foam sticky sheets to attach the letters. You could use a hot glue gun, or anything you want to attach letters. You could also save money and time, and skip making 3D letters and just paint the letters directly on the buckets.
STEP SEVEN
After your board is done, has it's screws and buckets in place, and all of the letters are attached/painted on--you are ready to add the sand. Fill the buckets with sand leaving an inch or two open on the top. Insert one Sterno can the middle of each bucket on top of the sand. Then cover the sand with decorative sand and glass beads. I found my glass and glass beads at the dollar store...so I saved money there. 

Here is how it looks when you're done adding the sand...


FINISHED PRODUCT

Thursday, July 10, 2014

The Busty Bride: How I Emancipated the Girls from the Burden of Breast Shame...


My breasts started growing in the 4th grade. By the time I was in Junior High, I probably was a 30C. By High School, my bosom-cup runneth over, so to speak, into a D cup. By the time I was an adult woman, I entered in the "Beyond D" category in bust size and have been there ever since. But life with Tig Ol' Bitties is no cup of tea. I'm not complaining about my body, because I have grown to accept and love most parts of my physical appearance and my bust line is no exception. The only issue I have is how society views Busty Women and how you are treated simply because of the way the genetic cards fell. 
"The way my body looks is offensive and I should shamefully cover up."
I realized something: My breasts gave a message to the world that I did not ask or co-sign for--that large breasts meant you were inherently more sexual and that because of that, displays of your body are: A) Invitations for sex and sexual advances, B) You are "showing off", and C) The way my body looks is offensive and I should shamefully cover up. 


My family affectionately calls it the "McBean Curse". My paternal lineage is full of big-breasted women with big personalities. My parents were very good at helping me establish a good self-esteem when it came to body image. When I was young, society and the media had a huge influence on how I felt about myself. No matter what my parents told me at home, it didn't erase the pain of being called a "Slut" just because of the way my body looked. I've been sexually harassed at school, work, and by people I don't even know because of my breast size. I fought hard to not let the size of my chest become who I am, although many times in my life, it has been a focal point. The funny thing is, I didn't ask for these breasts. I didn't sign up for this, but I live with it. I gain weight in my chest and stomach, like a man. My hips are narrow and my
physique is athletic. Whether I exercise or not, I always have rockin' hot legs and a full bra. The only thing that has helped me control the size of my breasts is rigorous and unrelenting exercise and a super clean diet. The smallest my boobs have ever been as an adult woman was a 34D when I was a very fit marathon runner. In this picture, I was probably 16-18% body fat, biking 6-18 miles a day, lifting super heavy weights 5 days a week, and running up to 40 miles per week. But the truth is, I've fallen horribly out of shape in the last 3 years, and although I still haven't even come close to my previous weight, I am now at a 34E. I don't know if I could ever withstand the amount of exercise I used to do now, and I don't know if it's worth it just to go down a few cup sizes.

Divine as the Candy Fairy

"I was asked to cover up because I "had cleavage". I really wanted to say, show me a girl with a 34E bust that doesn't."

The last encounter I had with feeling ashamed about my breasts was Halloween of 2013. We were allowed to wear costumes to work. I decided to be a candy fairy. I made little bags of candy to distribute to my co-workers and the children that came to shop there that day. I was super inspired by Katy Perry at the time, so I went full throttle and threw myself into character. I felt so beautiful and free. I felt fun and amazing...just as I always do when I'm in one of my costumes with full makeup and fantasy face paint. I was at work for over 4 hours until I was pulled to the side by one of my female managers and was asked to cover up because I "had cleavage". I really wanted to say, show me 
a girl with a 34E bust that doesn't. I was really upset and I really wanted to leave, but I had to tough it out and stay the rest of my shift, while I knew everyone else knew that I was asked to cover my costume. I'm not easily embarrassed, but this was easily one of the most embarrassing situations I've ever encountered at work. I understand that companies have their policies and they want you to be "modest", but the problem I had is why did it take 4 hours for a management to "decide" that what I was wearing was offensive or inappropriate? The customers loved my costume and not one complaint was actually made that what I was wearing was inappropriate. What was appropriate during the first four hours that suddenly became inappropriate for the last three?The manager that pulled me to side told me this: "We don't want one of the customers to get the wrong idea and complain." I then asked the manager, "Did anyone complain?" Her answer was, "No, but we want to prevent that." Prevent what? Someone being offended simply because I have large breasts? And if seeing me and my body type for who I am and what it is is the "wrong idea", what is the "right idea"?

"I left from work feeling ashamed, belittled, singled out, and defeated."
And the funny thing about this situation is the fact that the skirt of my costume was so short, I had to wear bloomers and tights underneath it. The fact that the skirt was short was never even brought up. And if there was any reason that I shouldn't have been able to wear the costume, it should have been the length of the tutu...but taken into context of what the costume actually looked like in it's entirety, not one customer had a negative reaction to it. Parents were actually coming up to me asking to take pictures. Little girls were following me around the store in awe. Many parents said that my costume was their child's favorite. The bottom line is, no customer was offended or deemed what I had on to be inappropriate. I was forced to put on a tee-shirt over the costume I paid $90 for. I was hoping to win a costume contest we were having. Needless to say, I wasted my money because I didn't win and I won't be participating in this type of dress-up day at work again...but in a way I DID win, because the whole point of me being a real-life fairy is to bring joy to the people that you encounter while you're in character. And THAT, I did accomplish; however, I left from work feeling ashamed, belittled, singled out, and defeated. Sure, you could blow any of this off as needing to be compliant to company policies and rules, however, these rules are very rarely explained. Companies are often vague and ambiguous about their dress code regarding the amount of bust you can show at work, and not fairly enforced with people of different body shapes or bust sizes. Even if two women were wearing the same shirt, I can guarantee the busty one will be pulled aside, even if the two women are showing the same percentage of cleavage. I've seen them Booty Shame with other employees with large backsides by asking to wear different clothing even when other women with less ample posteriors are wearing the exact same thing. It's discrimination no matter how you slice it up. If it's a rule for one person, it should be a rule for everyone. 
"...My breasts are a force of nature. They show themselves off."

There's no way to justify this contorted thinking other than to objectify the person and look at the parts of them separate from the person as an individual. There is an unspoken societal rule that larger breasted and fuller figured women should "cover up" in order to try to hide what society views as overt displays of sexuality. The truth is, I'm not a slut nor do I dress with the intention to be identified as one. I have been with my husband for three years in an 100% a monogamous relationship. He's the only one I desire or ever want to be with. I don't purposely try to dress provocatively. When it's hot, I wear shorts. I like to wear tank tops. I hate sleeves in general. I feel more comfortable in V-necks than other types of collars. 
I like to wear costumes. In society, I am told that I have to be uncomfortable and wear clothing that doesn't make me feel or look good because it might be perceived by others as an overt display of my sexuality. 
"...it is often a fight to get people's eye-contact or to get them to understand you're actually smart, and not a bimbo."
A long time ago, I had a female co-worker who would CONSTANTLY talk about my bust size ad nauseum. She would make offensive remarks and talked down to me and about me as if I wasn't even there. It was a case of breast-envy. She would often make remarks that I, "Show myself off". Sweetie, my breasts are a force of nature. They show themselves off. The most unsettling thing about  the nature of breast-shaming in the workplace (in my experience) is the fact that men are not generally the perpetrators. It tends to be other women. These women are "offended" by the way you naturally look and feel the need to control the way another woman dresses. I think some women believe that having larger breasts is automatically an asset and gives you some sort of advantage in life. For some, it may be an advantage; but I can think of 10 cons to being busty for every 1 pro. People automatically thinking you are a porn star because you got a new bra is not all it's cracked up to be. People in the workplace always make jokes or ask questions about my breasts that I find to be highly inappropriate. For some reason, it's okay because all Busty Women ENJOY negative attention that is directed at their bodies. One male co-worker (who's old enough to be my father) asked me outright if my breasts have gotten bigger. Dude, that is totally a question you ask yourself in your head, and keep to yourself. Pervert. People are highly insensitive and will express fake "concern" about how sexual you might appear to others, when the truth is THEY are the ones looking at you sexually and it disturbs them. I have found that it is often a fight to get people's eye-contact or to get them to understand you're actually smart, and not a bimbo. And it doesn't matter what you wear, if you have big breasts, especially on a small frame, people will notice and comment regardless. Putting a shirt on them doesn't make them invisible and they cannot be "covered up" or minimized short of intensive and painful binding (which I actually resorted to in high school--wearing 2-3 bras at a time and huge baggy shirts to try to "hide them). 


Yaya Han as the Absinthe Fairy
Photo Taken from YayaHan.com 
When I think of being a real-life professional fairy, it is a source of exhilaration and empowerment. I look up to costume designers like Yaya Han. And although I am not nearly at her level as far as costuming and colorful fashion, my creative spirit flows through the same vein as hers does. She's my hero. She's living her life being the fantasy in her own mind, and that is how I want to live too. However, in order to be the true life Peacock Princess that I am, I need to accept that the way I am shaped is beautiful and that I need not be ashamed of my body. She certainly isn't. And when I see her bust held ever so perfectly in her custom-made costumes, a part of me feels validated that it is her creativity and acceptance of who she is and how she looks that has made her notable. Not just the size of her chest. 


So when it came time to picking dresses for my wedding, I started off with a mission to find  "bust minimizing" clothing. I was not looking forward to seeing my bust on display and knowing how some people might interpret my lack of cleavage-discretion as inappropriate. HAHAH! I laugh about this in hindsight now, because there was nothing bust minimizing about what I wore for my wedding and it was futile to look for something that was. After I found my dresses, I realized that what I needed was not "bust minimizing" but "bust accentuating clothing". And guess what...NOT ONE SINGLE PERSON SAID A GOD-DAMNED NEGATIVE THING ABOUT MY CHEST, just like when I wore the costume to work.  I can't let a few ignorant individuals make me feel like I should be ashamed of my bust size. I needed to shake off the notion that me feeling beautiful, even though I displayed cleavage, was wrong even on my wedding day. I decided to stop worrying about making other people feel uncomfortable and took comfort that for one day, I promised to myself not to cover myself up for other people. I decided to wear what I wanted and was determined to feel beautiful. I was naive to think I could minimize my bust, or that I ought to. Ironically, I got just as many compliments on my breasts as I did my dresses! Instead of being shamed, my breasts stole the show--as they rightfully should, because they are a totally beautiful part of me that is a gift. I have learned you have to own it.
This entry has become epic in length, but I wanted to say a word of thanks to Georgina Horne, the author of "Fuller Figure Fuller Bust" Blog for helping me gain the confidence in to wear two of the most beautiful garments I've ever had the honor of wearing. Without her tips about body-acceptance and how to clothe a fuller top, I can be confident that I feel as good insideabout the way I look on the outside.  I am never again going to apologize for the size of my breasts. And I will never attempt to hide them again in order to make others feel comfortable. 


I have learned that I deserve to see myself as I am
 and it's okay to like what I see.